Shadow Map Baker
Surface → Shadow Map Baker
Bakes the light in a room into a texture and puts it back on a copy of the
surface, as a decal_dirt decal. This is the technique GTA V's own interiors
use: an MLO gets almost no real-time shadow indoors, so the shadow is painted
into the asset before it ever ships.
Your mesh is not touched — the bake lands on a duplicate.
Watch it work
A whole bake, start to finish: preparing the shadow mesh, baking ambient occlusion, then pulling the result into shape with Levels - which does not re-bake, so the contrast is dialled in for free.
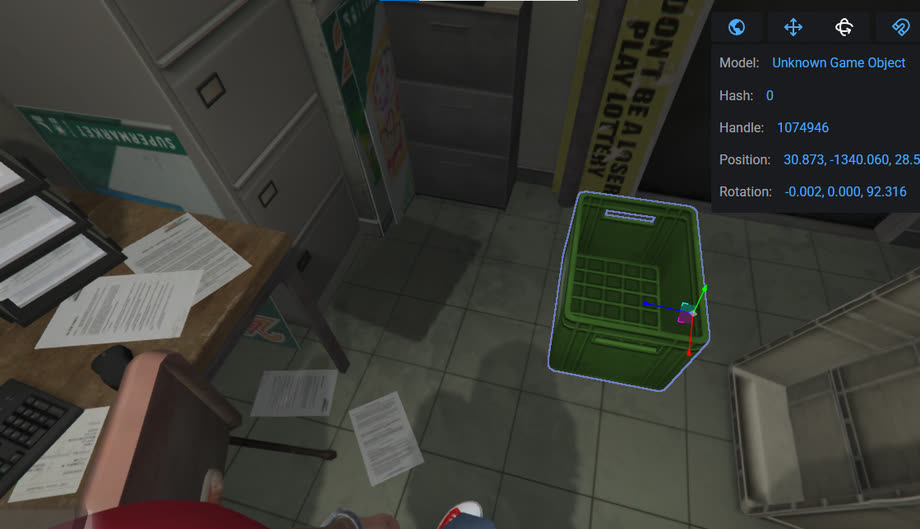
The same bake in game. An MLO gets almost no real-time shadow indoors, so without this the crate floats.
The three steps
The panel is deliberately in this order, and each button needs the one before it:
1. Prepare Shadow Mesh
Duplicates what you selected, pushes the copy off the original along its normals by Offset Distance, unwraps it, and puts the bake material on it.
The offset is what stops the decal z-fighting with the wall it sits on. The unwrap is its own layout, not the wall's — a wall's UVs are built for a tiling texture and usually overlap themselves, which would draw the shadow twice.
2. Bake & Process Texture
Runs the bake, then applies the post-processing in one pass.
Bake Mode is the decision that matters:
| Mode | What it uses | When |
|---|---|---|
| Ambient Occlusion (recommended) | the room's own geometry and the World | almost always — it needs no lights and reads as contact shadow everywhere |
| Auto Sun | a sun you aim with Angle and Altitude | when the room has windows and you want light coming through them |
| Custom Scene Lights | the lights you placed yourself | when the interior's lighting is already built and you want that exact look |
Resolution 512–4096, with Half Resolution Bake for a fast look before committing, and Samples 64–2048. Samples are the cost: they buy smoothness, and everything below is there to let you spend fewer of them.
Denoise cleans the grain a low sample count leaves. Post Blur softens the result afterwards — a shadow map is low-frequency by nature, so a little blur usually reads better than more samples. Clamp Fireflies removes the single bright speckles a light catching a sharp corner produces; if you see white dots in the bake, this is the switch.
AO Distance sets how far the occlusion reaches — small values give a tight contact shadow in the corners, large ones darken whole walls.
3. Levels, then Save Changes to Disk
Invert, input black/white, Gamma, output black/white. These are live: they change the preview immediately and do not re-bake, so you can dial the contrast in without paying for the bake again.
Nothing is written until you press Save Changes to Disk. That is the point of the split — the expensive part happens once, and the cheap part is free to be wrong for a while.
The file lands next to your .blend unless Output Path says otherwise.
What comes out
- a duplicated mesh, offset and unwrapped, carrying the baked map
- a Sollumz
decal_dirtmaterial with the texture in it, so it exports the way the game expects - the image saved to disk, ready to be converted for the game
Bake once, adjust for free
If the shadow is too dark or too flat, reach for Levels before you re-bake. A re-bake costs seconds to minutes; levels cost nothing and can be undone by dragging them back.
Cycles has to be enabled
Cycles is an add-on, and on some installs it is switched off — the Render Engine dropdown then offers only EEVEE. Baking needs it: Edit → Preferences → Add-ons, search Cycles, tick it. The panel says so rather than failing with a raw error.
Cycles does the baking
Blender bakes with Cycles, whatever your viewport is set to. A very large surface at 4096 and 2048 samples is a real wait — start at half resolution and 256 samples to find the look, then bake it properly once.
Credit
Contributed by @cs-dev-09 — see Thanks.